Trace: • Scheduler
Table of Contents
Version: 1.0 / 2022-03-31
Introduction
The VisionX scheduler allows us to automate recurring activities. We can call workflows, server actions/functions and any Java code periodically.
The activities can be performed annually, monthly, daily, hourly, every minute or every second. For example, we can send invoices to all customers via an invoicing workflow on the first day of each month.
Installation
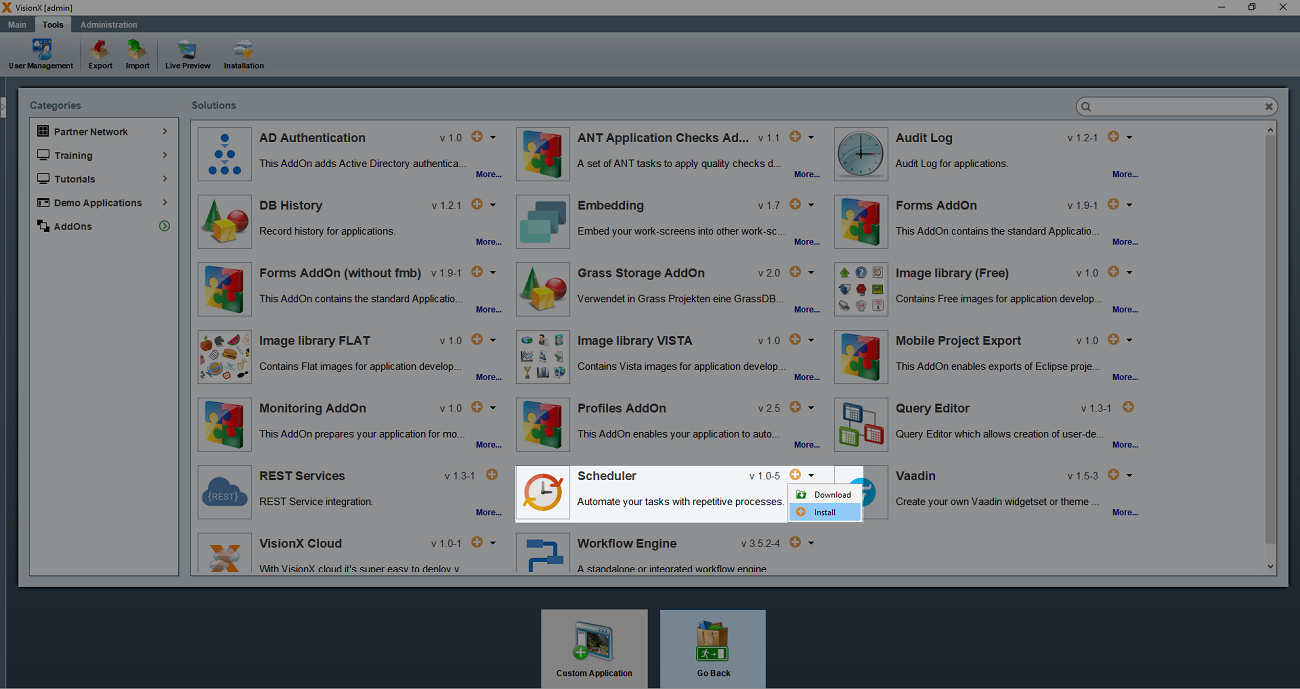
To install the Scheduler Add-On, launch VisionX and click on “Ready Made Solutions” at the bottom of the screen.
Then click on Add-ons on the left side of the screen under “Categories” and select the dropdown list next to the “Scheduler” icon and click “Install”.

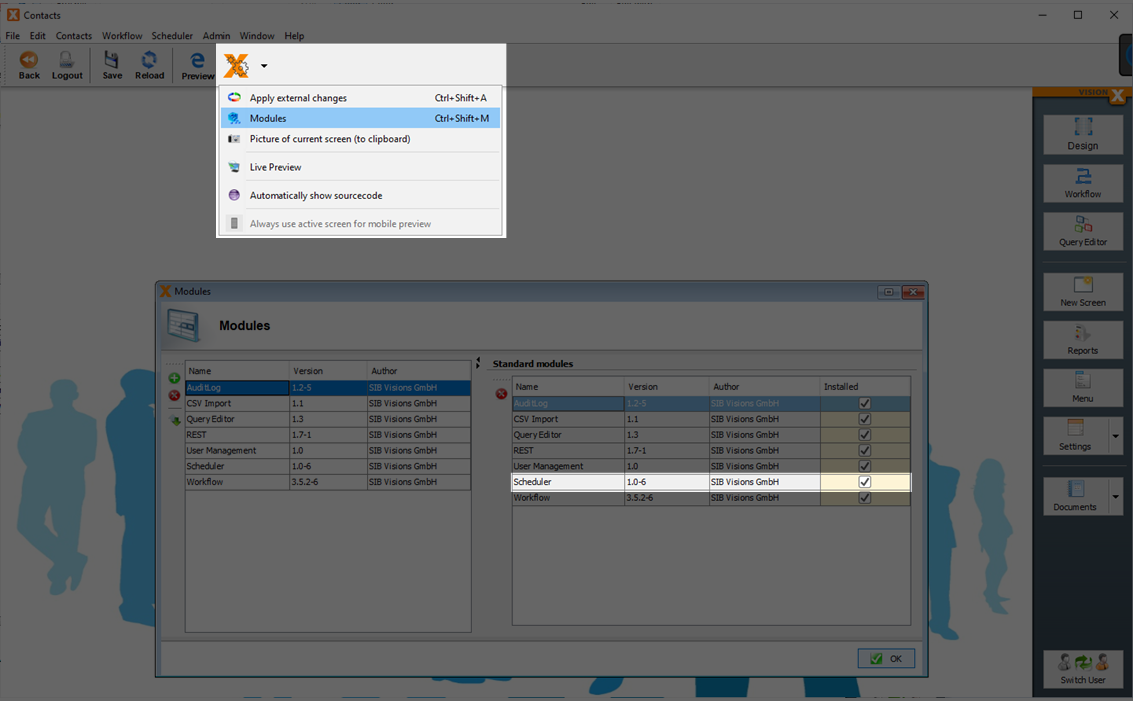
After the installation, a restart of VisionX is necessary. After restarting, select the application you want to use and click on “VisionX Settings” on the top toolbar and select “Modules”.
A list of available modules will appear. Now select the checkbox associated with the scheduler to install the module in the application.

To create a new scheduler job, select the scheduler from the application “Settings” drop-down list on the right-hand side of the screen. Click on the “+” symbol on the left side to create and configure a new job.

Configuration
| Setting | Description |
|---|---|
| Job | Unique name of the job |
| Execute as user | Select the user who should execute the job |
| Started | This box only appears checked if the job is running |
| Execution | Separate Process: In case the execution of a process takes longer than the interval was set, it will be executed only when the previously started process is finished. |
| Parallel Process: The new process will start even if the previously started process is still running. | |
| Interval | Here you can define the interval at which the process should be executed. Seconds, minutes, hours, days, months and years can be selected. For example, a job can be executed every 7 days at 12:00 |
| Reference Date | If a “Reference Date” is specified, all remaining intervals are calculated based on this date. |
| Next Start | Time at which the process will be executed the next time |
| Last Start | Time when the process was executed the last time |
| Last Duration | Duration of the last started process in seconds |
| Current Start | Time at which the currently running process was started |
| Current Duration | Current duration of the actually running process |
| What is executed | Here you can choose between “Server Action”, “Workflow” and “Java Source” |
Without specifying an interval, reference date or next start, the process will be executed immediately after clicking Start.
Workflow
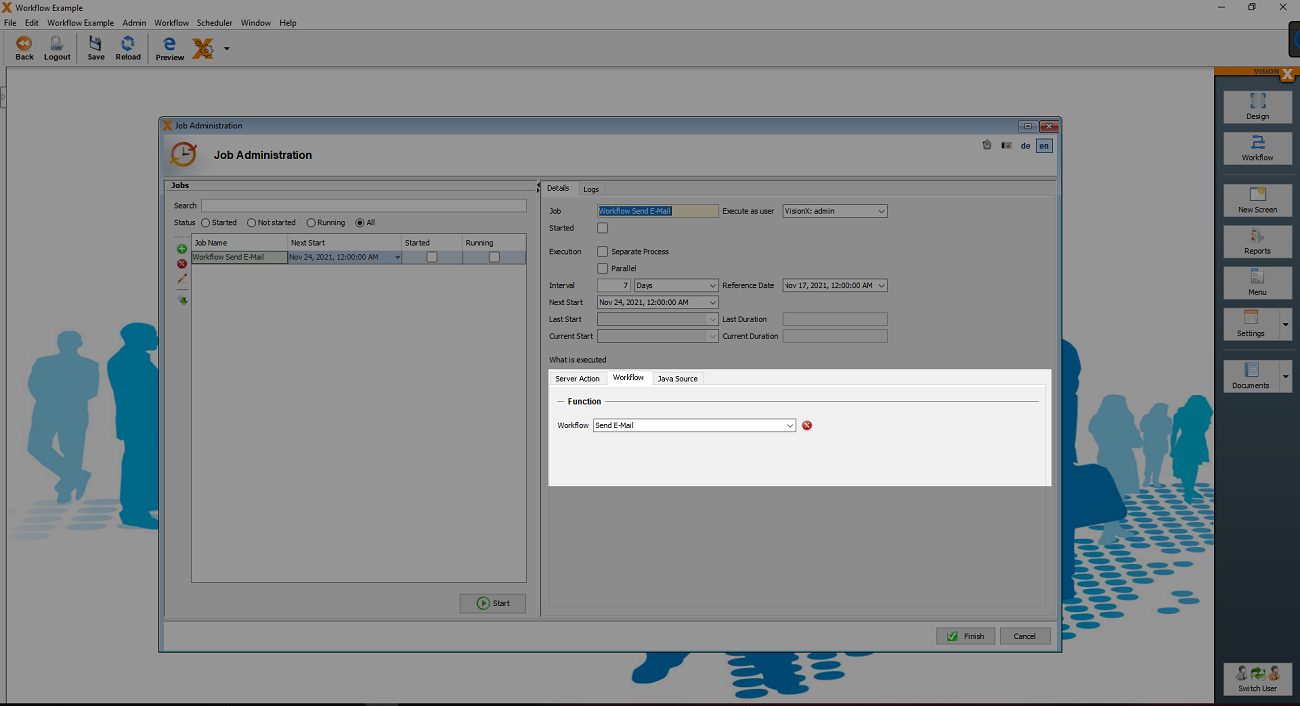
To be able to call up a workflow, we must first create one for the application using the VisionX Workflow add-on. We can then select the desired workflow to be executed using the drop-down list. Here, the corresponding parameters can also be entered.

Server Action
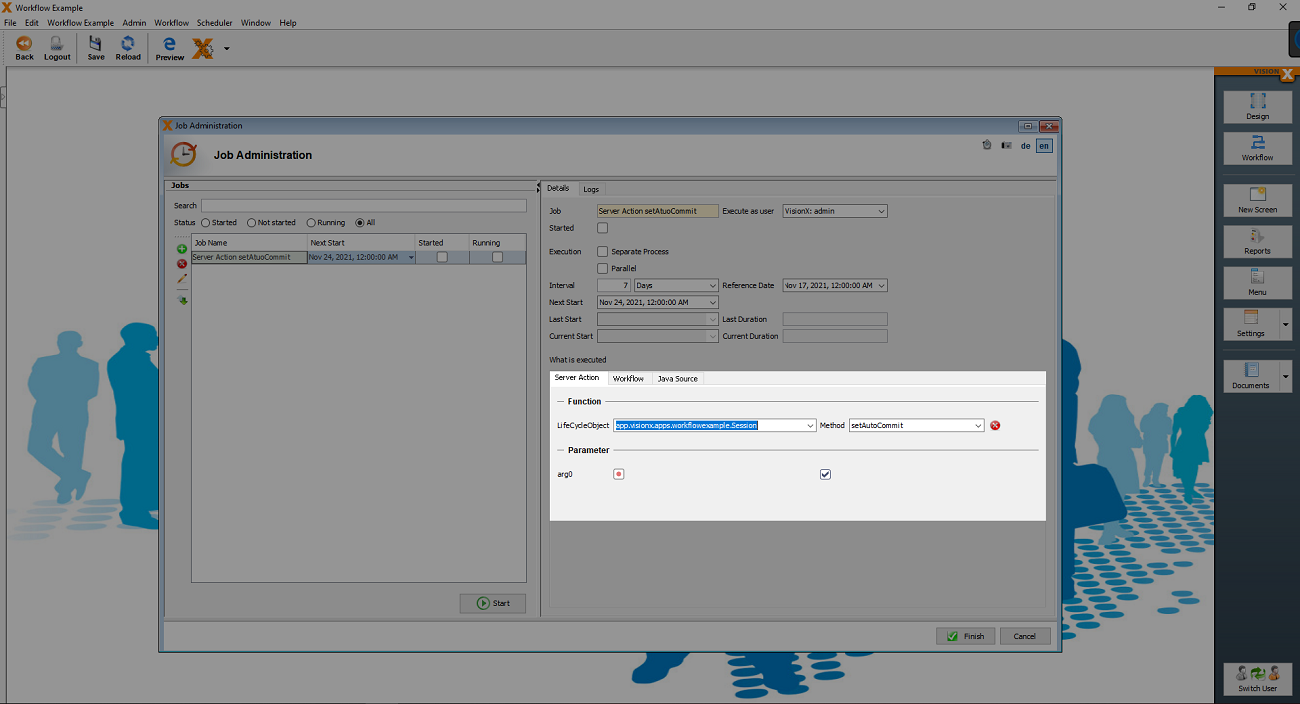
In the first step, a so-called “Life Cycle Object” must be selected. This is the server class for a screen or the Session class. e.g.: MyScreen.java to MyScreenWorkscreen.java. Afterwards all associated methods can be selected.
After selecting the method, the appropriate parameters can also be entered here. To view the automatically generated source code, simply click on the “Java Source” tab.

Start/Stop
When everything is configured, click on the “Start” button to start the job.
With a click on the “Stop” button the job can be stopped at any time.
Editing
Note: A job can only be edited if it is stopped first.
Logs
In every VisionX application with an activated Scheduler Add-on there is a Logs screen. This screen can be opened via the Scheduler - Logs menu item.
You can find all configured jobs here. These can be filtered using the full text filter or by status.
On the Logs tab, all actions already performed by the selected job are documented.


