Table of Contents
Version: 1.0 / 2019-10-30
Introduction
EPlug is a plugin to extend the Eclipse Java Integrated Development Environment with support and additional features for development with the JVx Application Framework and the VisionX Rapid Application Development Tool.
Because JVx is utilizing various different techniques to achieve its goals and the necessity to work around technical limitations, we provide support to IDEs like Eclipse to achieve a very good user experience when building complex applications.
Features
EPlug extends the Java IDE with additional features and functionality, for example:
- Extended auto-completion
- Extended compile-time checks
- Extended hover information
- Various commands
Additionally, it adds the ability to interact with VisionX directly from the Java IDE for certain actions, both triggered by the user and automatically.
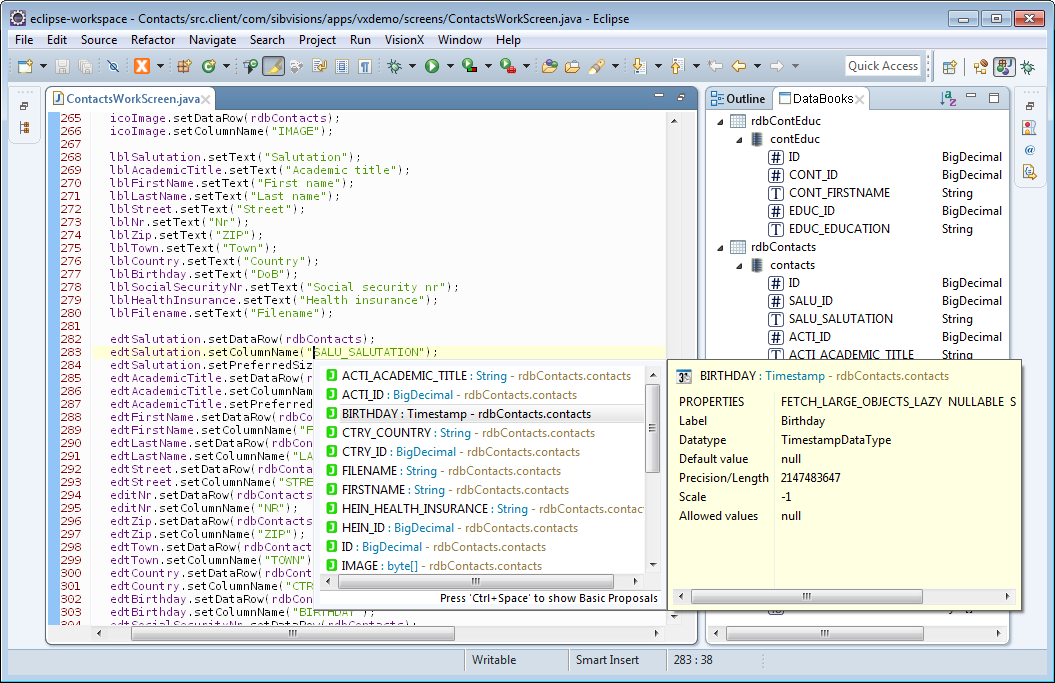
For a complete and detailed list of features, see Interaction with VisionX.
Installation
EPlug can be installed from the Eclipse Marketplace by using the EPlug marketplace entry.
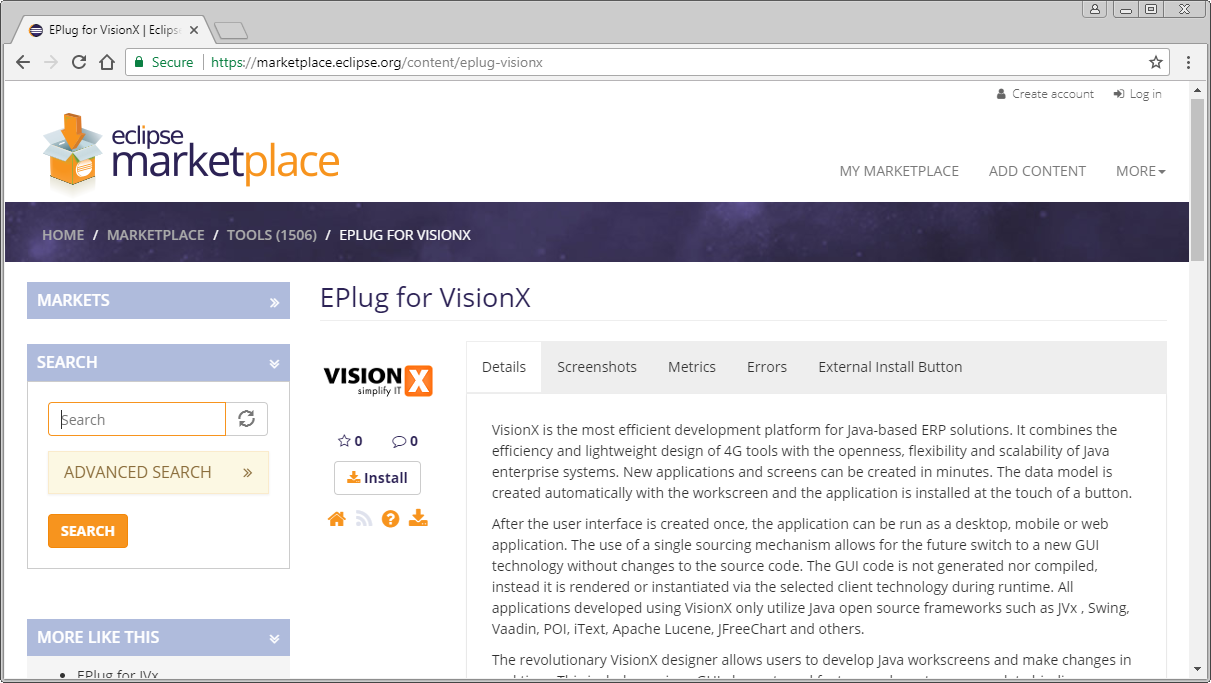
Drag the “Install” into the running Eclipse instance to install the plugin.
License and Trial
When Eclipse started the first time after EPlug has been installed, a prompt is opened to either select a commercial license file from the local disk or to request a new trial license from the license server.
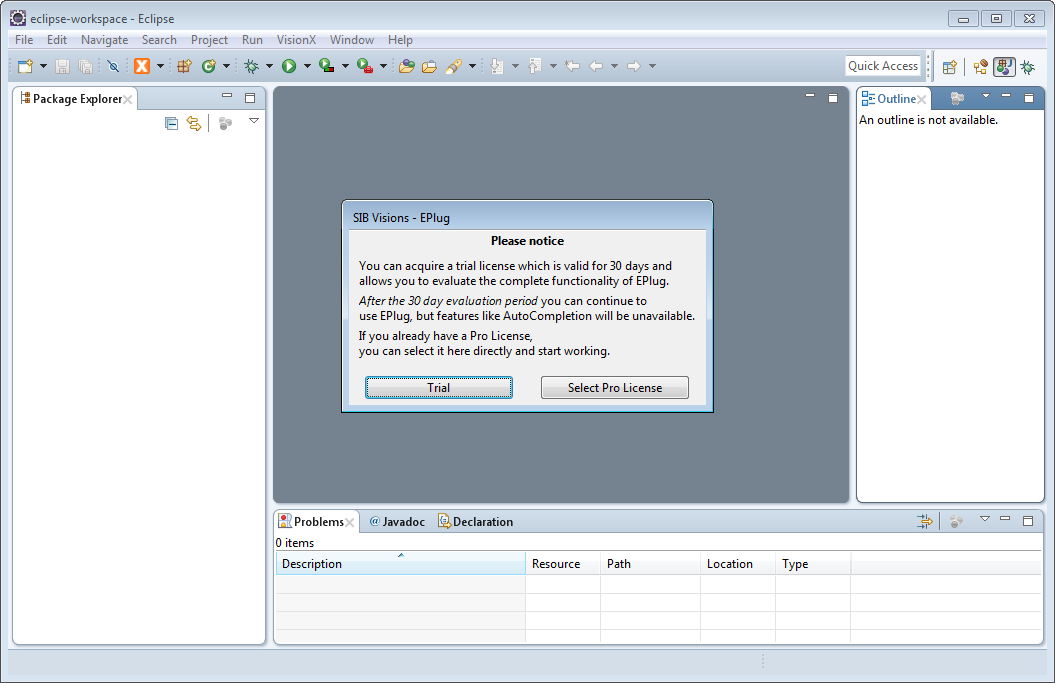
When a new trial license is requested, the license server will be contacted and a new, unique trial license will be issued.
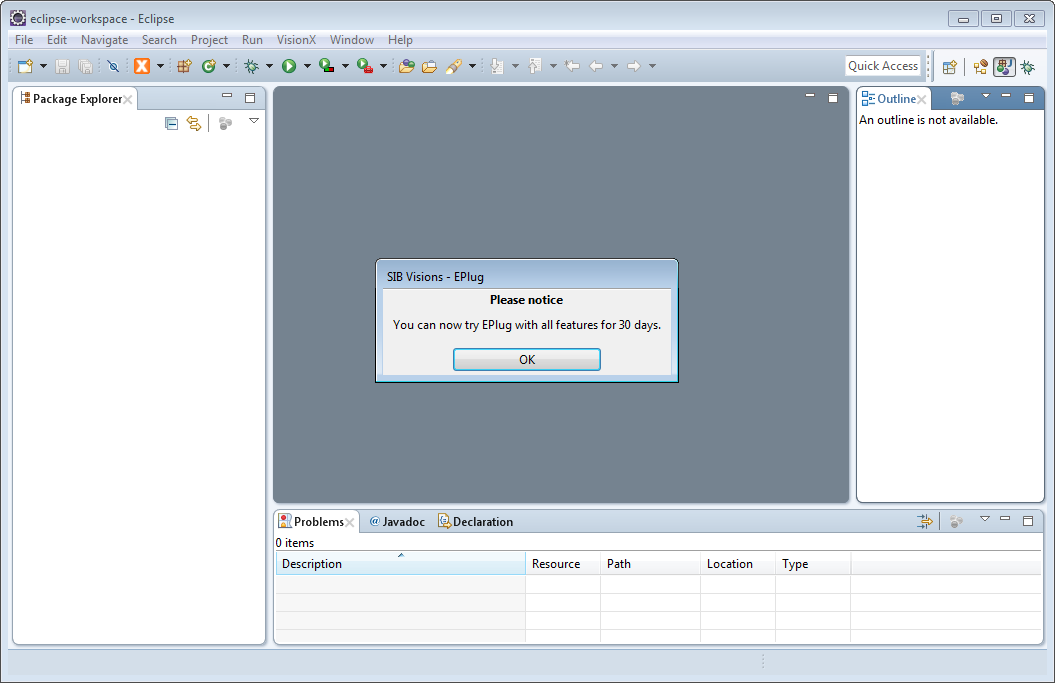
A commercial license can also be selected anytime in the preferences under EPlug -> License.
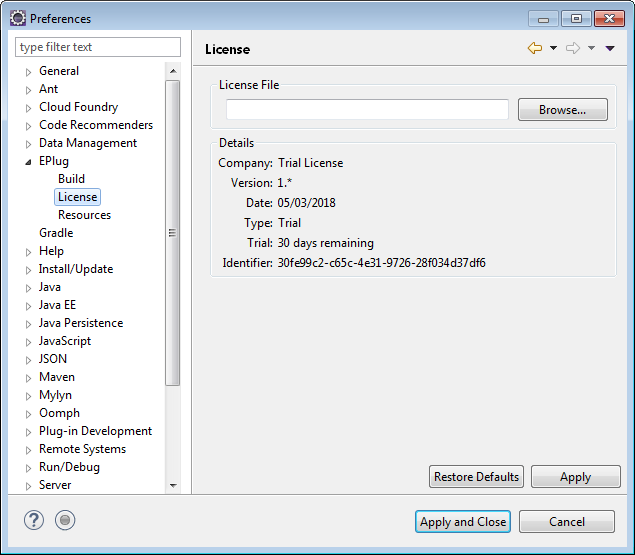
In the preferences, you can also view various information about the license, including the time remaining until it is expiring if it is a trial license.
Using EPlug
For all features to be available, EPlug must be activated on the current project. This can be done through the First Run Wizard which is displayed when Eclipse is started the first time after the EPlug installation.
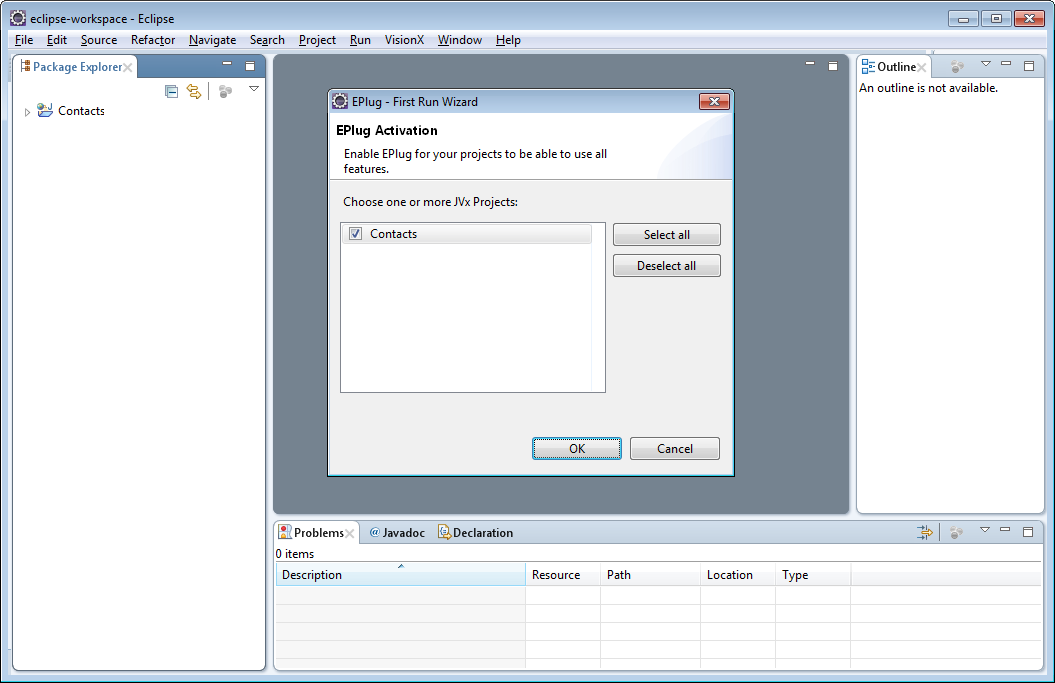
Select all projects on which you want to enable EPlug and press “OK”.
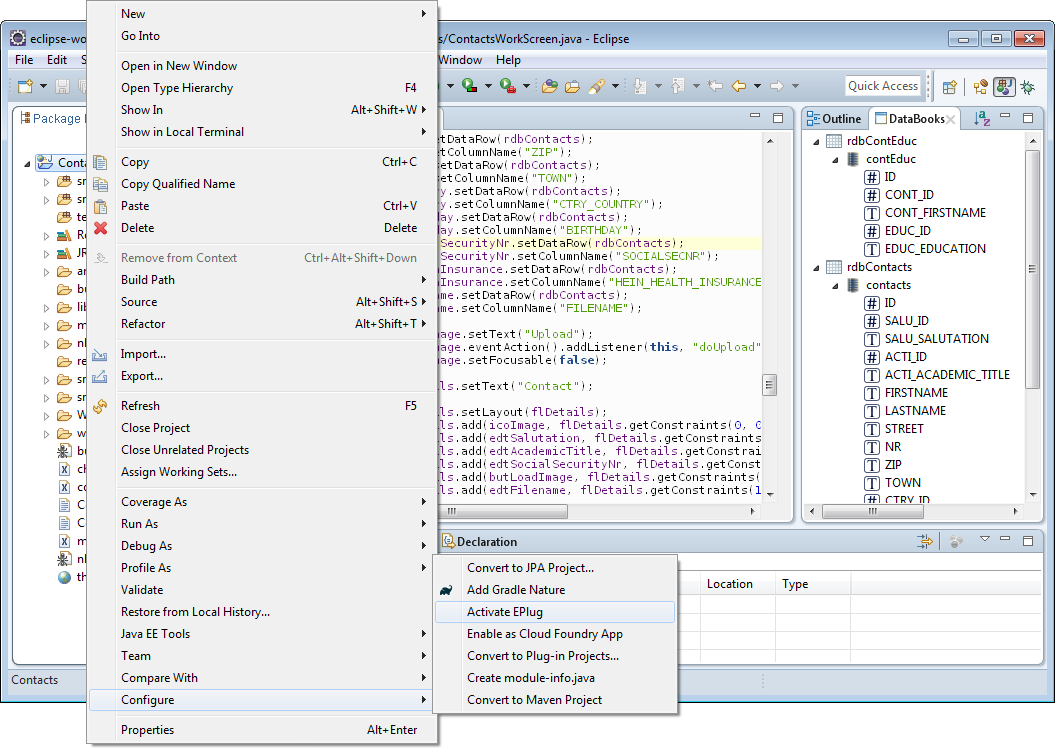
Afterwards, EPlug can be activated on single projects through the project context menu.
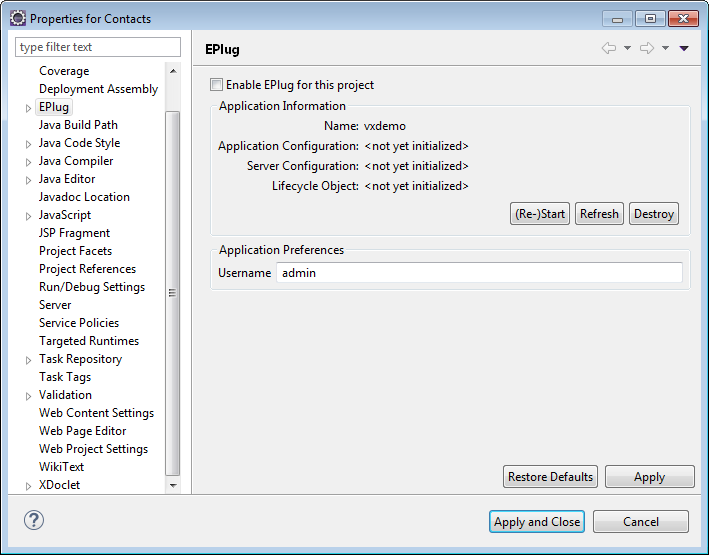
Or through the project preferences.
Commands
EPlug provides various commands which can be used to navigate the project. These are either available from the context menu on a source file or can be assigned custom keybindings through the Eclipse preferences.
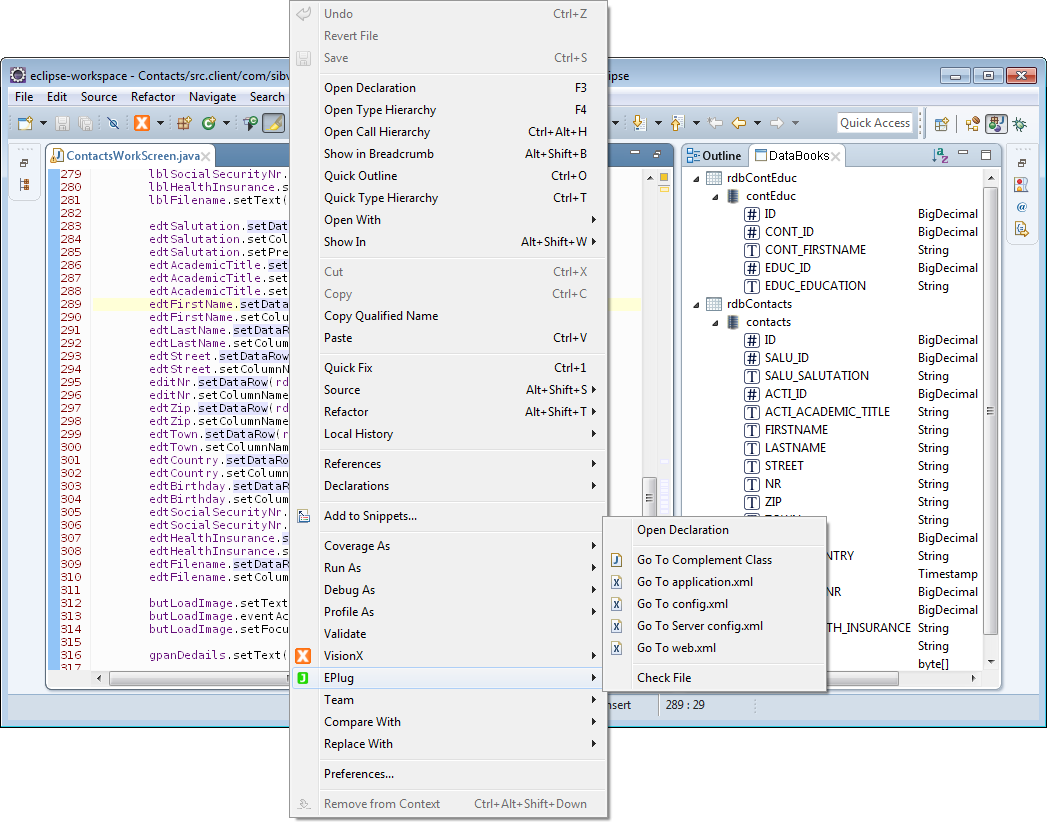
Open Declaration
Extends the Eclipse “Open Declaration” command to be able to also jump to the declarations of actions and server calls. Because it extends the built-in functionality, this can be used as a replacement for the built-in command.
Go to Complement Class
Opens the complement class of the currently open file.
The complement class is the “counterpart” of every class on the client or server. So, when invoked on a workscreen (client-side), it will open the server-side LCO class and vice versa.
Go to application.xml
Opens the application.xml file of the project.
Go to config.xml
Opens the client-side config.xml file of the project.
Go to Server config.xml
Opens the server-side config.xml file of the project.
Go to web.xml
Opens the web.xml file of the project.
Check File
Runs all EPlug checks on the file without building it anew.
DataBooks
The biggest and most important feature of EPlug is the support for DataBooks, both RemoteDataBooks and MemDataBooks to be exact.
Because DataBooks use Strings to identify columns (instead of properties or Enums), it cannot be covered by the default functionality of Eclipse and the Java compiler. EPlug extends Eclipse with additional functionality to be able to provide various features on and around DataBooks and column names.
Both the RemoteDataBook and the MemDataBook are supported out of the box. In the case of a MemDataBook, the metadata is not requested from the data source (because there is none), but the metadata is directly extracted from the code itself.
Compile Time Checks
Column names are checked during compilation if they are correct or not. This is done by actually requesting the metadata from the data source and comparing the names against it. In the case of the MemDataBook, the metadata is built directly from the code.
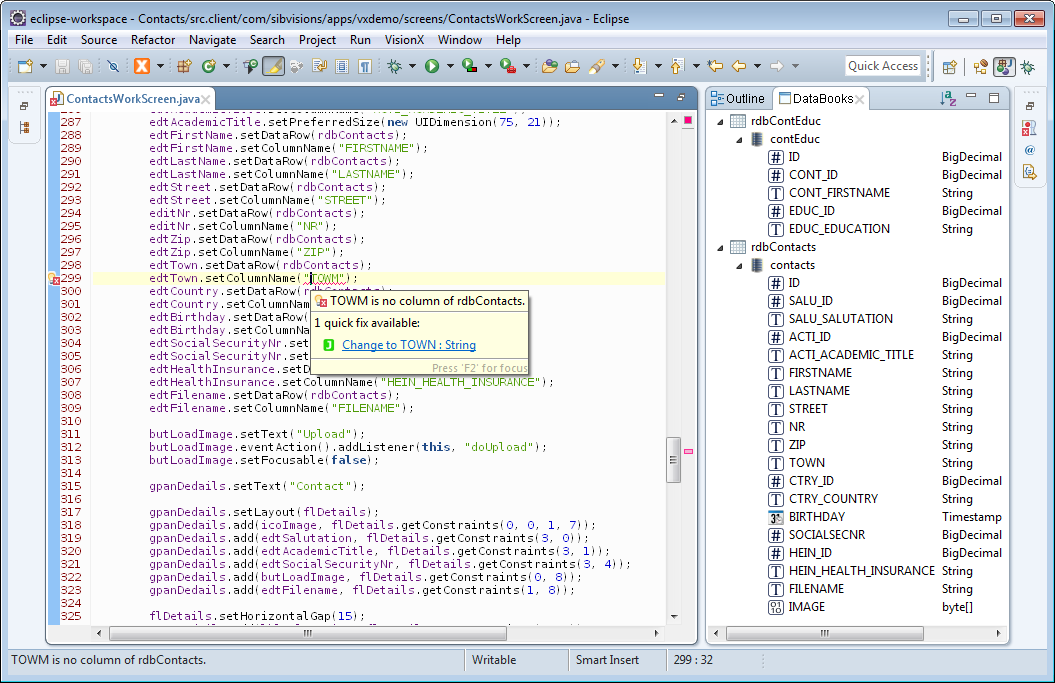
Quick fixes are provided in the case that a column name has been misspelled to make it easier to fix simple errors.
Hover Tips
When hovering over a column name, a hover tip is displayed that shows all the information about the column that is available. The information includes:
- Name
- Datatype
- Label
- Default value
- And various other properties
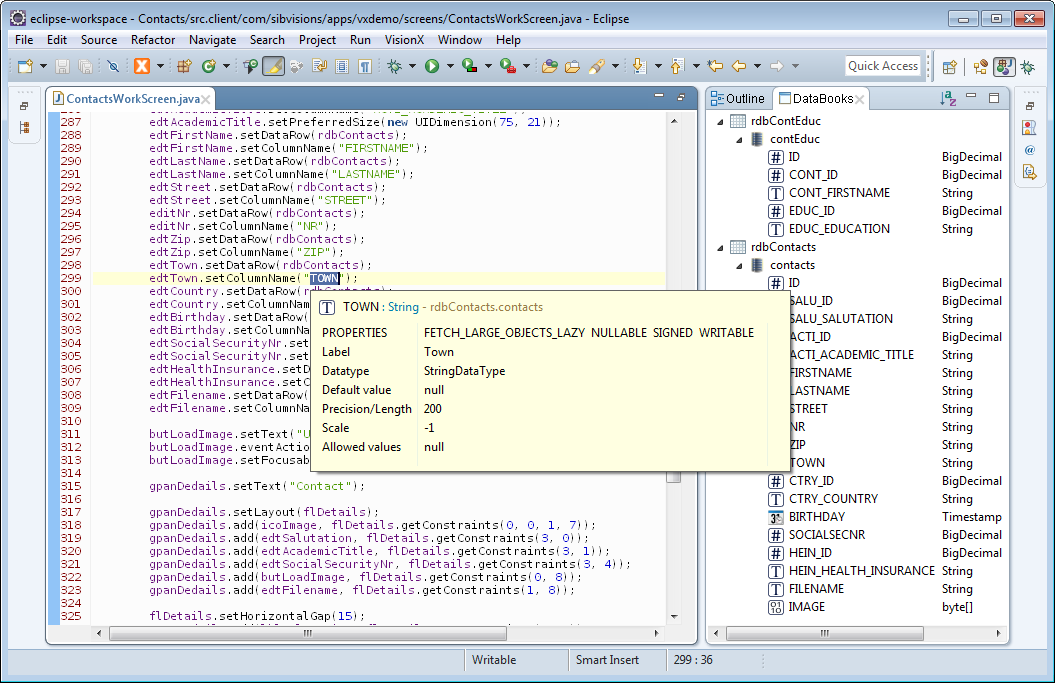
Code Completion
Column names are also offered in the code completion dialog as well as all available information about them.

The same information as in the hover tips is being displayed alongside all columns that can be selected in the code completion dialog.
DataBooks View
Additionally, there is the DataBooks view which lists all DataBooks and all columns in the currently edited file together with their datatype and label.
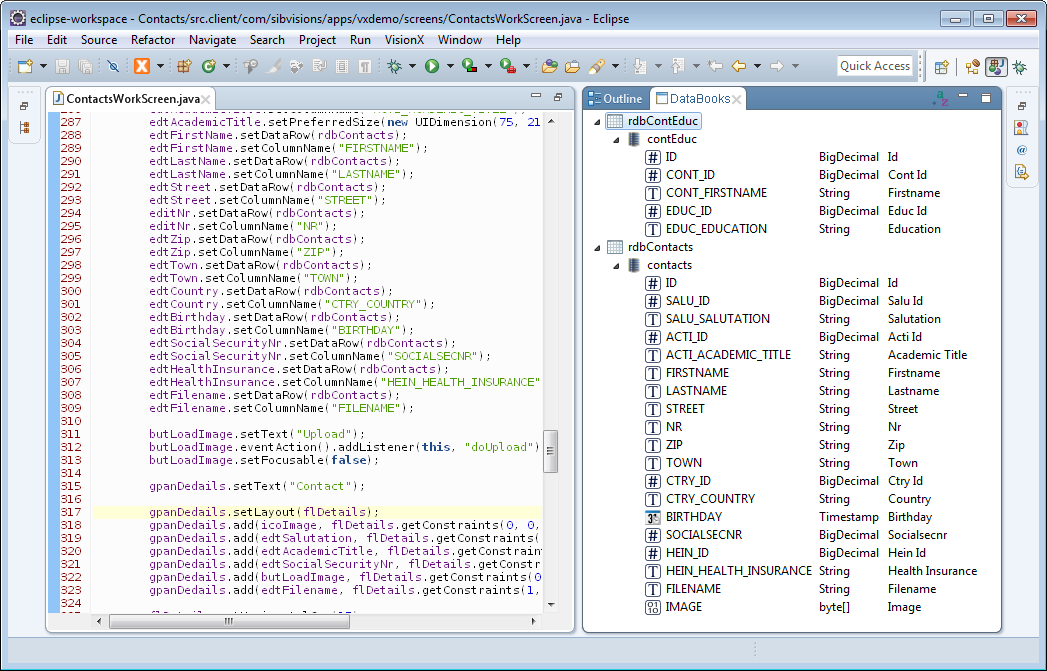
The view can be added to the Eclipse perspective in the menu under Window -> Show View -> Other....
Preferences
The behavior of the DataBooks plugin can be changed by changing the project preferences.
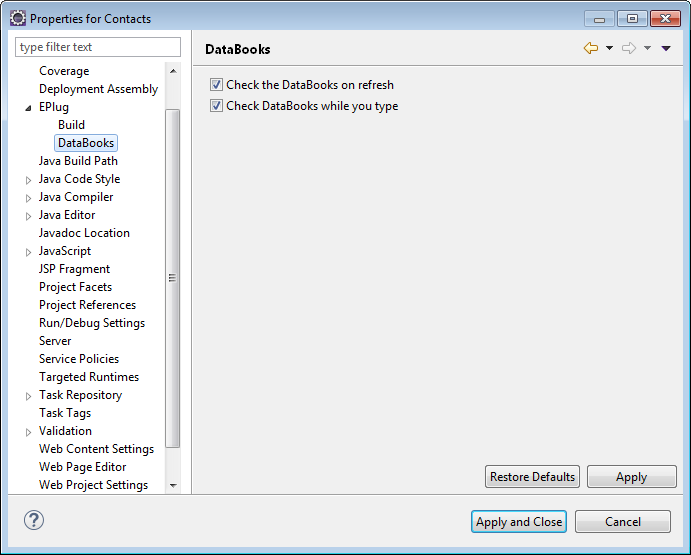
Check the DataBooks on Refresh
When enabled, DataBooks are checked when a refresh of the file is performed and not only when the file is build.
Check DataBooks While You Type
When enabled, DataBooks are checked as you type without the need to save and/or build the file.
This is especially useful when working with MemDataBooks, as their metadata might have been typed just seconds before being used.
Build Options
The build behavior can also be changed in the project preferences.
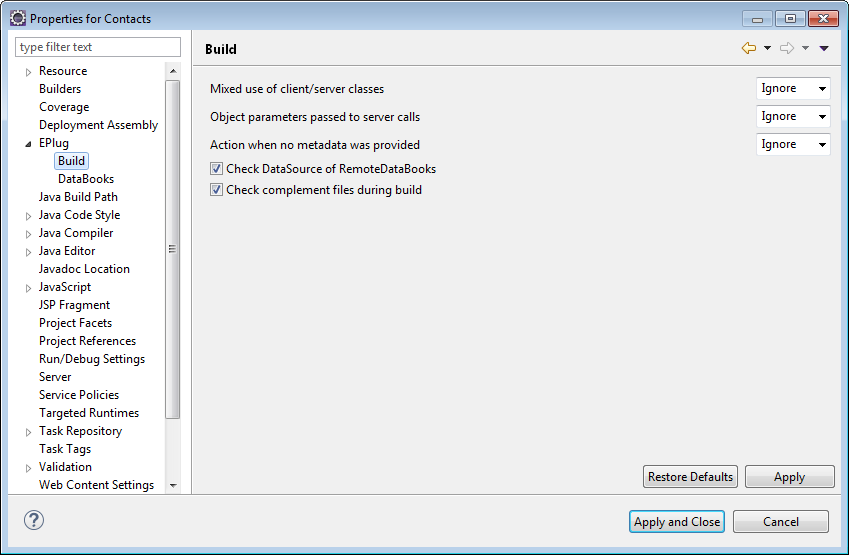
Action When No Metadata Was Provided
This option allows you to control how the plugin behaves when no metadata could be acquired for the DataBook that is being checked. Please note that “no metadata could be acquired” is not the same as “acquiring failed”. For example, it could be that a DataBook is the parameter of a function. In that case, is not possible to determine from where the DataBook originated, and so no metadata can be determined.
With this option, the behavior for such a situation can be controlled, whether the plugin should issue a notice/warning/error or do nothing.
Check DataSource of RemoteDataBooks
This option allows you to control whether the datasource on RemoteDataBooks should be checked if it is correctly set or not. This is basically a check if the name of the RemoteDataBook can be mapped to a server-side storage object.
Actions
Another pillar of EPlug is the support for actions. Actions are a simple mechanism which provide the ability to use method references by specifying an object and the name of the method. The ability to use “real” method references has only lately become an integrated functionality of the JRE and of course JVx does also support this.
Out of the box the EPlug support for actions does support all EventHandler extensions and various other methods.
Compile Time Checks
The action names and references are checked during compilation for their existence and correct signature.
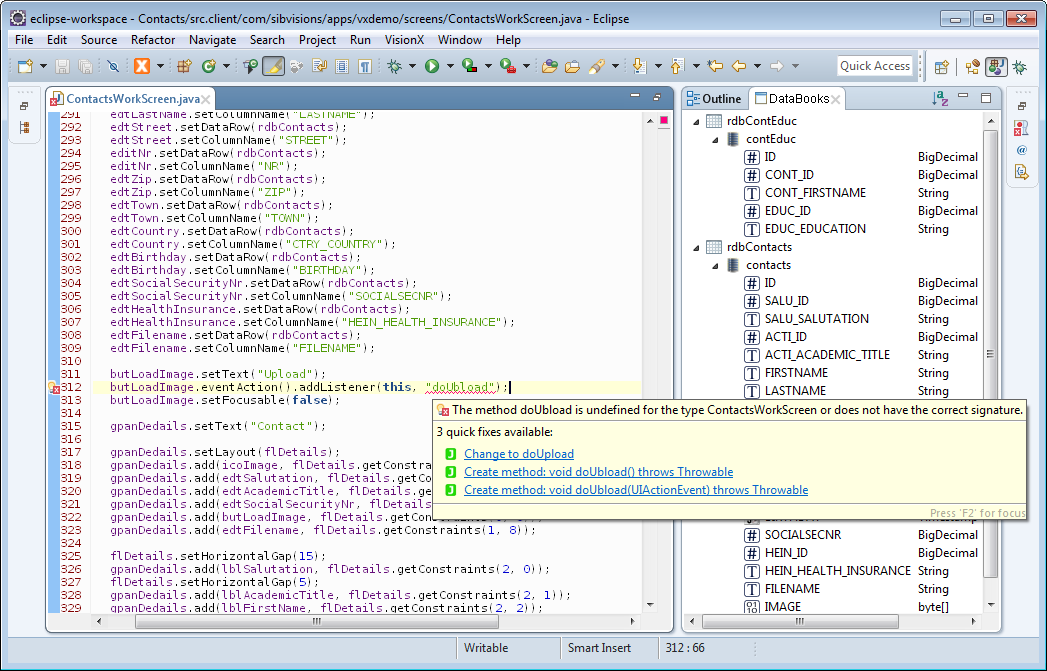
Quick fixes are provided in the case that a method name has been misspelled or is non-existent.
Hover Tips
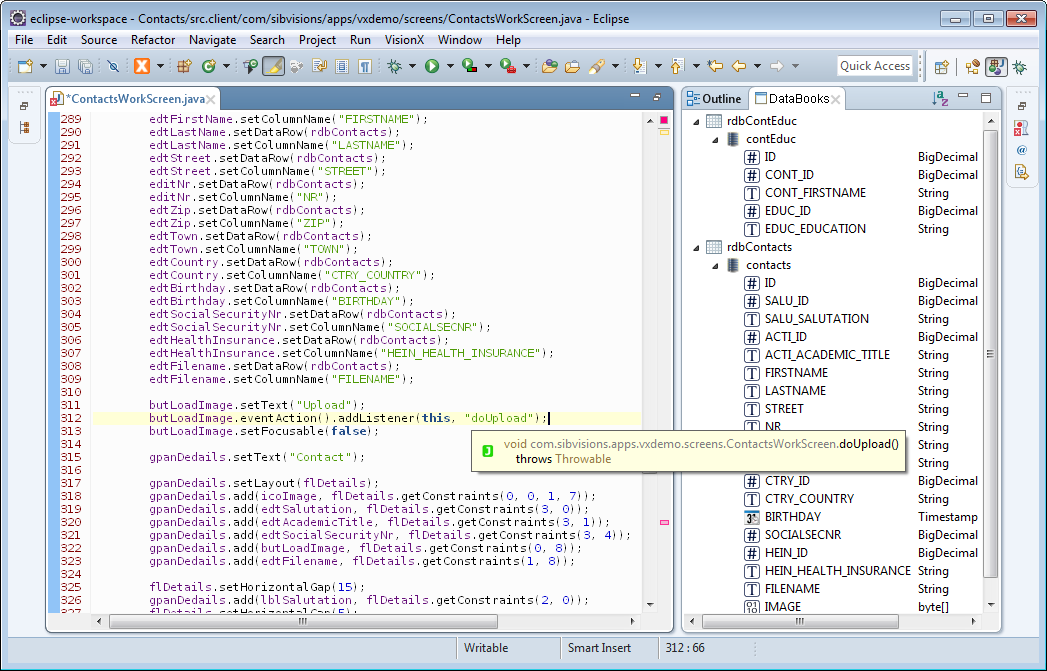
When hovering over the action name, a basic hover tip is provided which displays the most important information about the function.
Code Completion
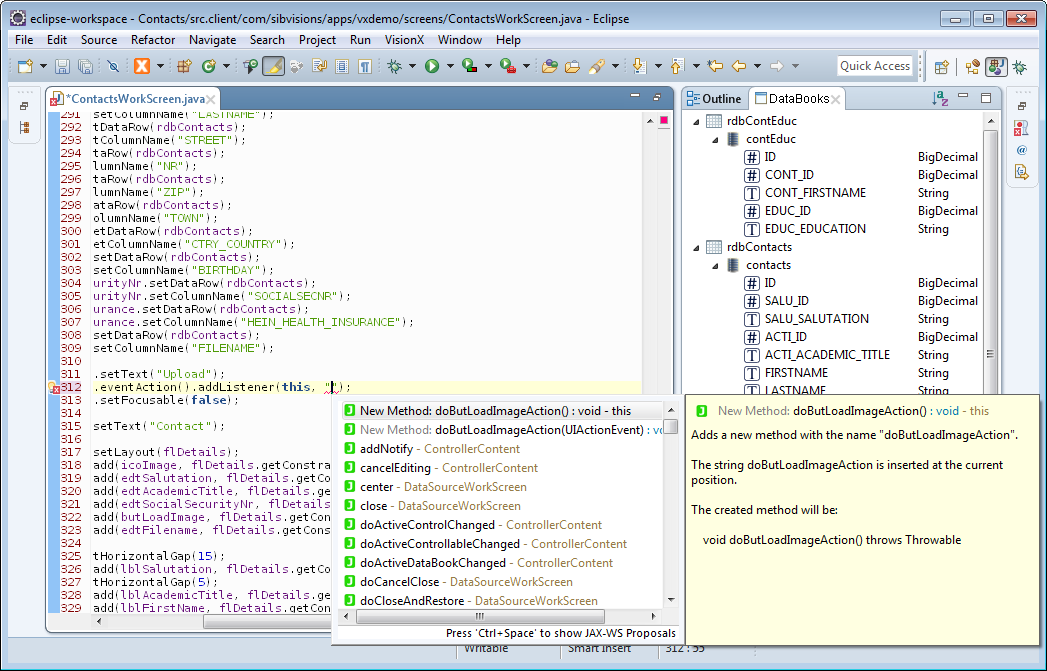
Action listener names are also offered in the code completion dialog.
Templates
To make it easier to create and add listeners, two templates are available from the code completion list that automatically create listener methods when chosen.
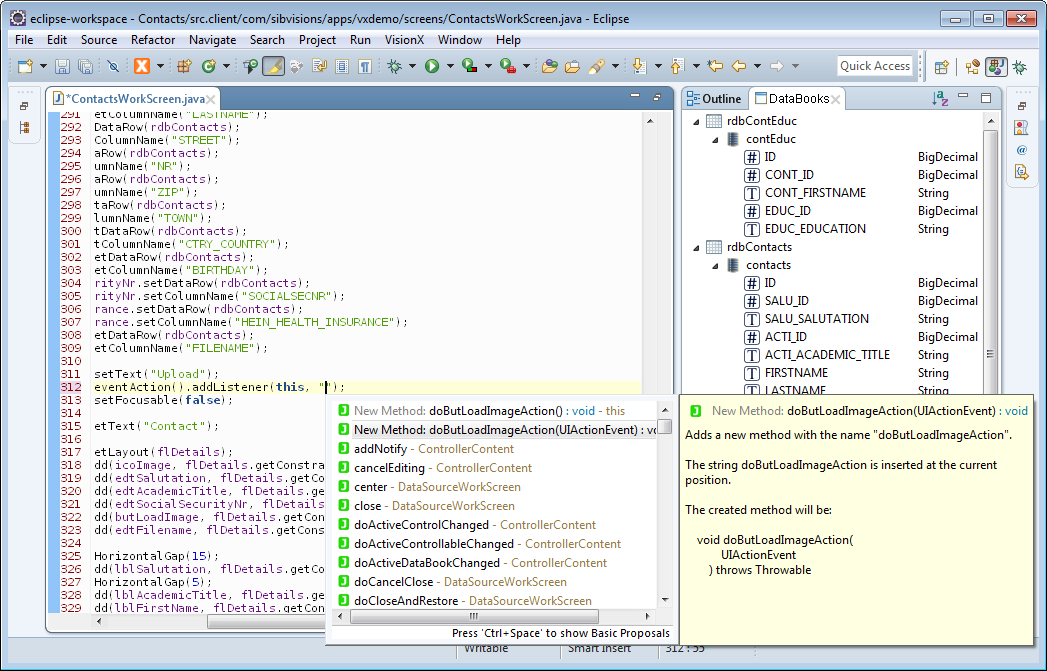
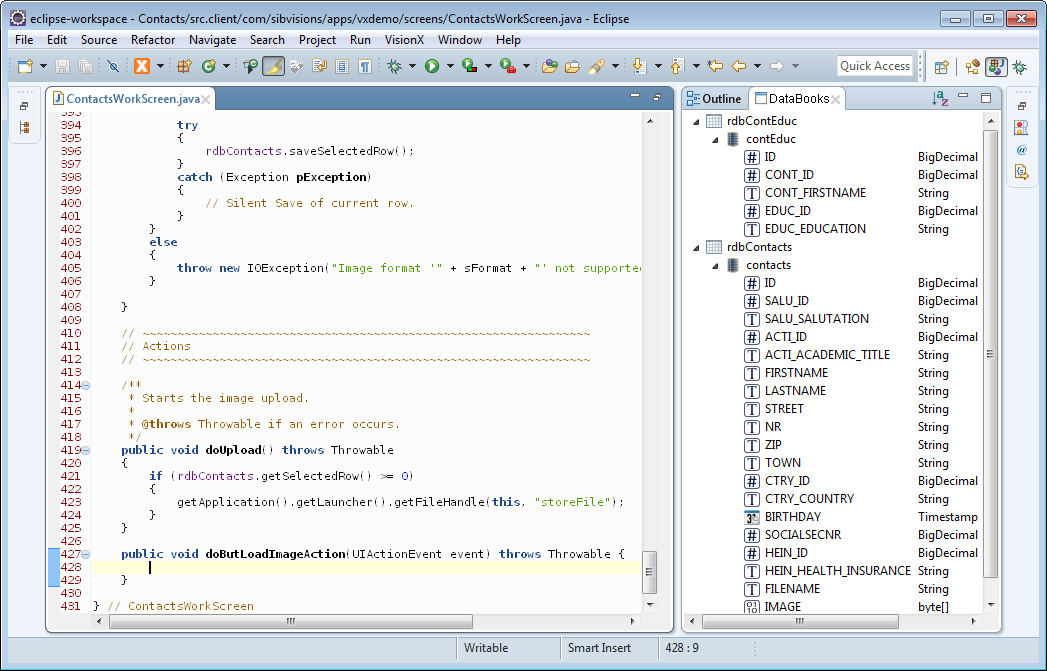
The first option creates a new listener method without any parameters, the second creates a listener method with the action specific parameters. The new method is inserted at the end of the class and can be edited directly.
Refactoring Support
When an action listener is refactored through the provided mechanisms of Eclipse, the references to it are automatically refactored too.
Server Calls/Actions
Through the connection of the application, it is possible to directly execute functions and actions on the server. JVx allows you to do this by specifying the function name to call on the server and appending the parameters for the to be called function.
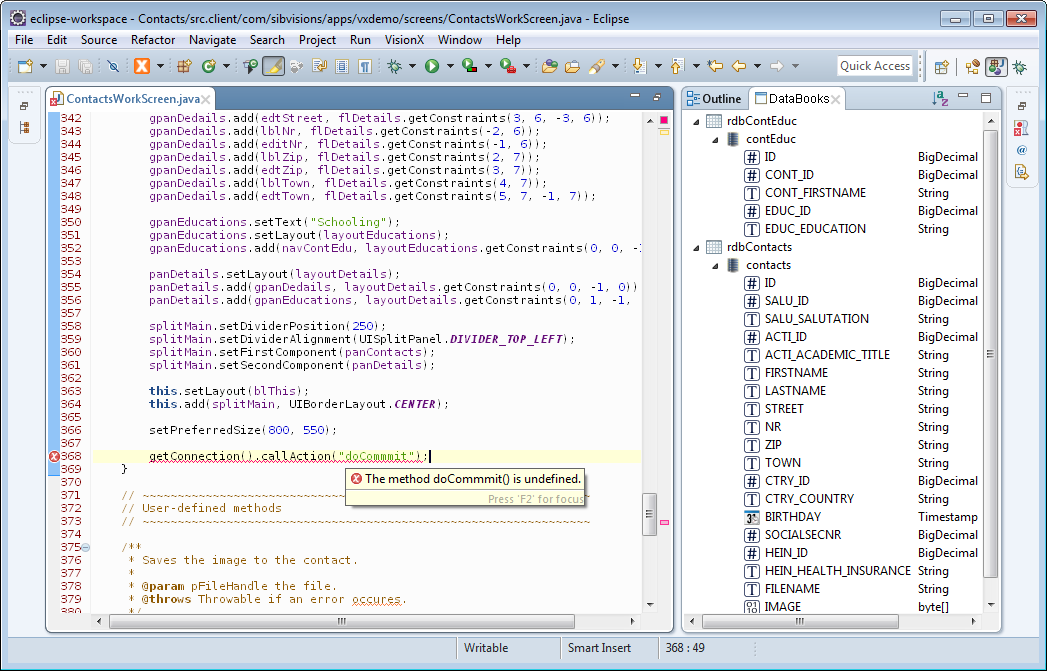
Compile Time Checks
The server calls/actions are checked during compilation for their existence and whether the correct parameters have been provided.
Hover Tips
When hovering over the name of a server call/action, a basic hover tip is provided which displays the most important information about the function.
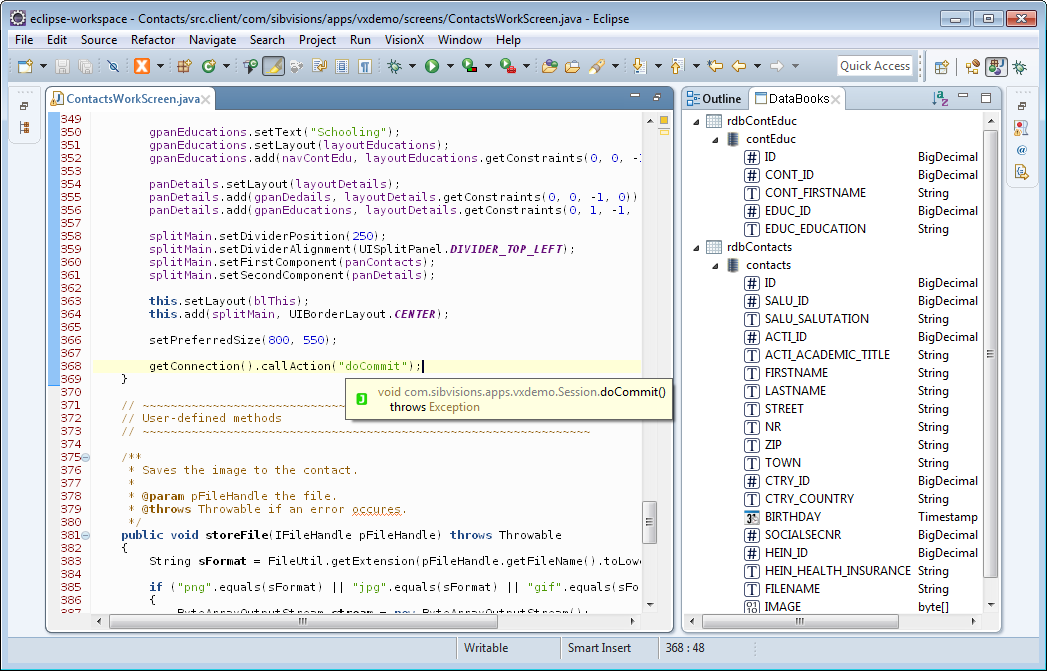
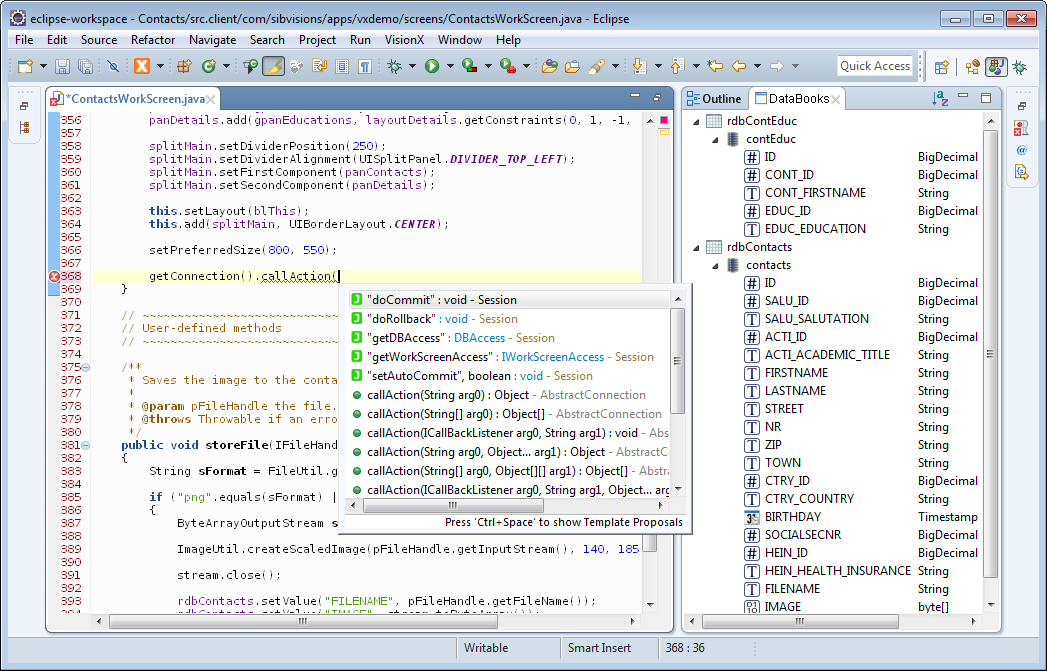
Code Completion
Server calls/actions are also offered in the code completion dialog.
Build Options
The build behavior can also be changed in the project preferences.

Object Parameters Passed to Server Calls
This option defines how the plugin should treat server calls/actions which are passed with Objects as parameters and whether it should issue a notice/warning/error or do nothing.
This is an especially useful function when one calls a lot of server functions with parameters from DataBooks. Let us assume the following server side function:
public String concatName(String title, String firstname, String lastname)
{
    if (StringUtil.isEmpty(title))
    {
        return firstname + " " + lastname;
    }
    else
    {
        return title + " " + firstname + " " + lastname;
    }
}
This can be called from the client side:
String fullname = getConnection().callAction(
        "concatName",
        rdbContacts.getValue("TITLE"),
        rdbContacts.getValue("FIRSTNAME"),
        rdbContacts.getValue("LASTNAME"));
The DataBooks getValue function does return by default Objects, but the server side function does expect three parameters of the type String. With this option, one can control what the plugin should if it encounters such a call, whether they should be flagged or not.
Resources
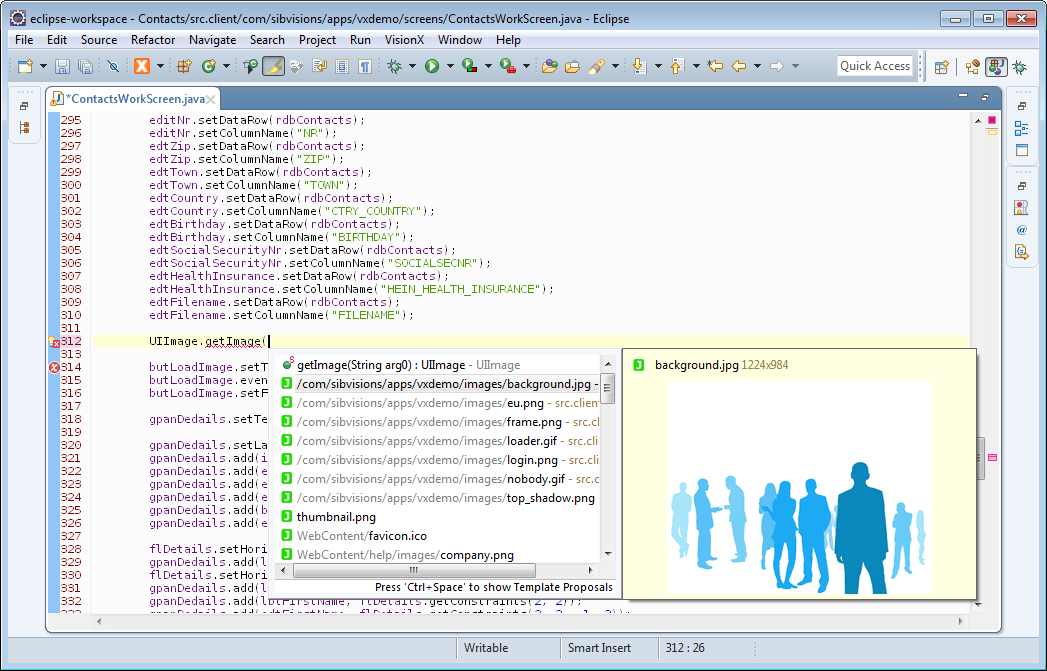
Resources, like embedded images or text files, are important to most applications. In the case of JVx, they mostly consist of images which are used to enhance the UI and are loaded through the UIImage facility.
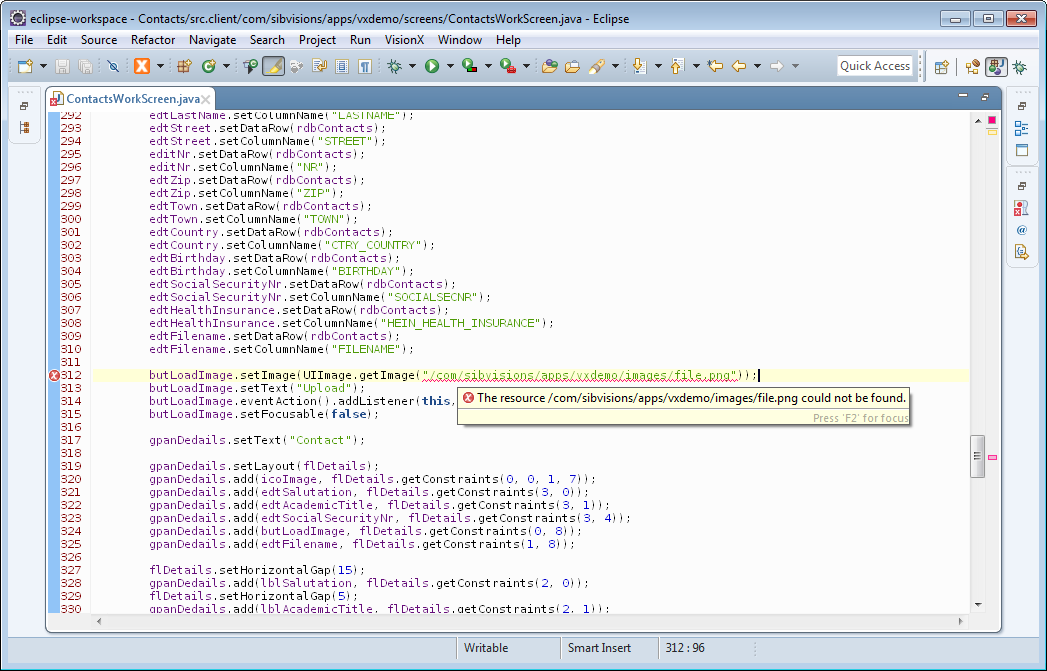
Compile Time Checks
The paths of resources are checked during compilation for their existence.
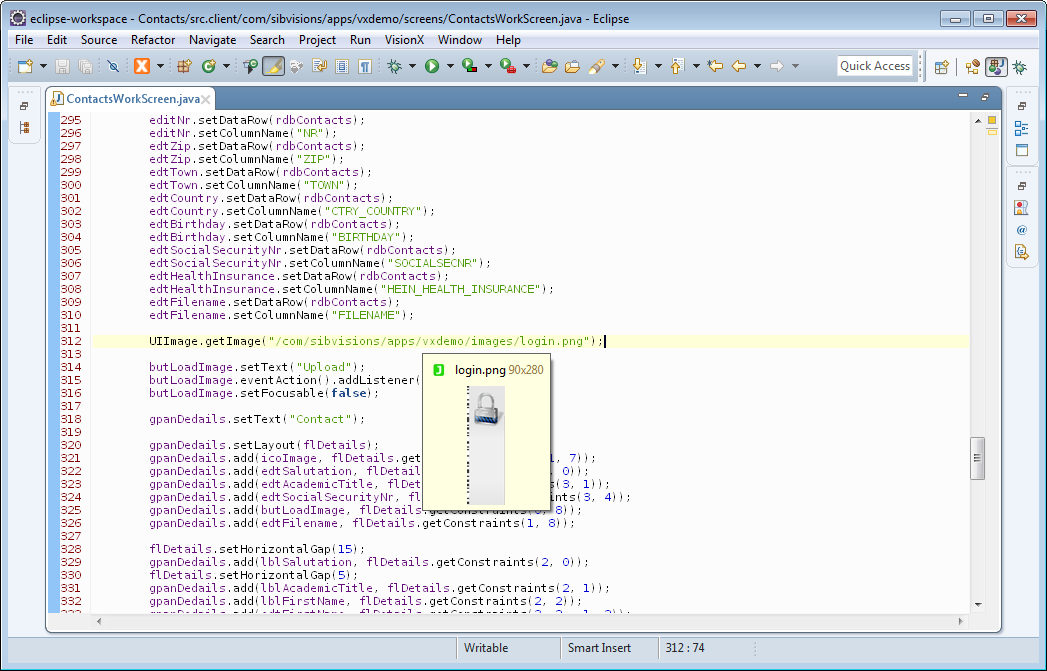
Hover Tips
When hovering over the path of a resource, a hover tip is provided which shows a preview of the image that is being referenced.
Code Completion
The paths of resources are also offered in the code completion dialog, complete with a preview of the image.
Comments
EPlug offers an additional plugin which provides various utility methods regarding comments.
Code Completion
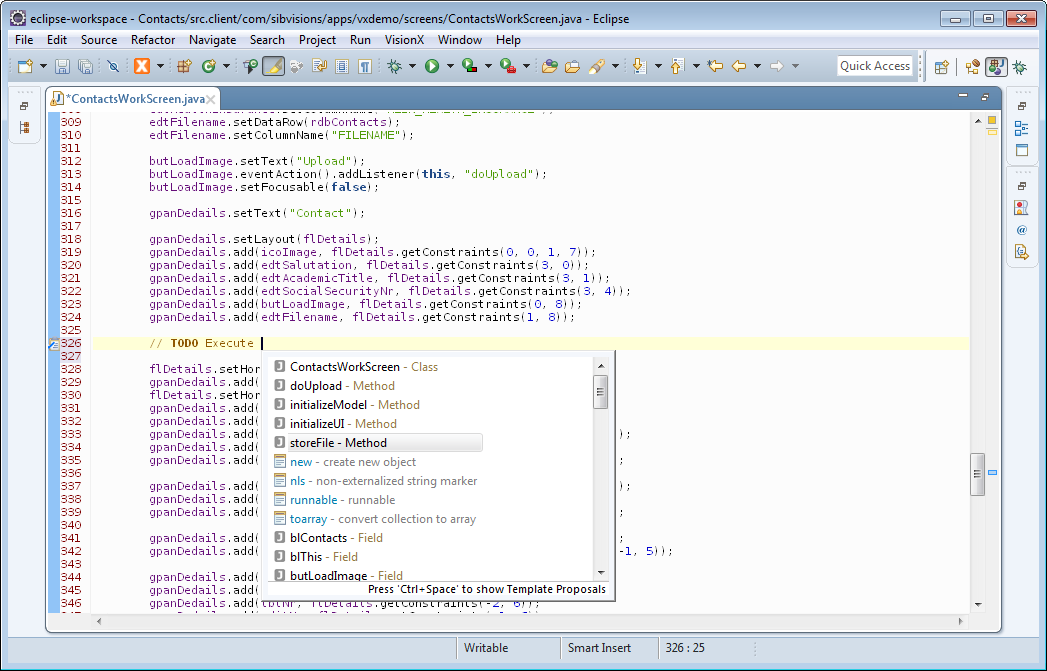
Code completion for the current class is offered while writing a comment. This includes the class name and all function names.
Separators
It is also possible to automatically insert the separators which are used to structure classes.

Additional Build Options
There are additional build options available in the project preferences.

Mixed Use of Client/Server Classes
Allows you to check whether client classes are used on the server or the other way round.
In most deployment environments, the client would have no access to the server classes, and vice versa: the server would not have access to the client classes. As both sources are included in the development classpath, a mixup of the two can easily happen. This option provides a means to make sure that this does not happen, or at least so it can be spotted before deployment.
Check Complement Files During Build
Allows you to enable that complement files are also checked during the build.
See Go To Complement Class for more information.
Interaction With VisionX
VisionX is a rapid application development tool which let's you quickly create, edit, and publish applications. It has the ability to interact with EPlug, and EPlug can interact with VisionX in a variety of ways.
Connecting With VisionX
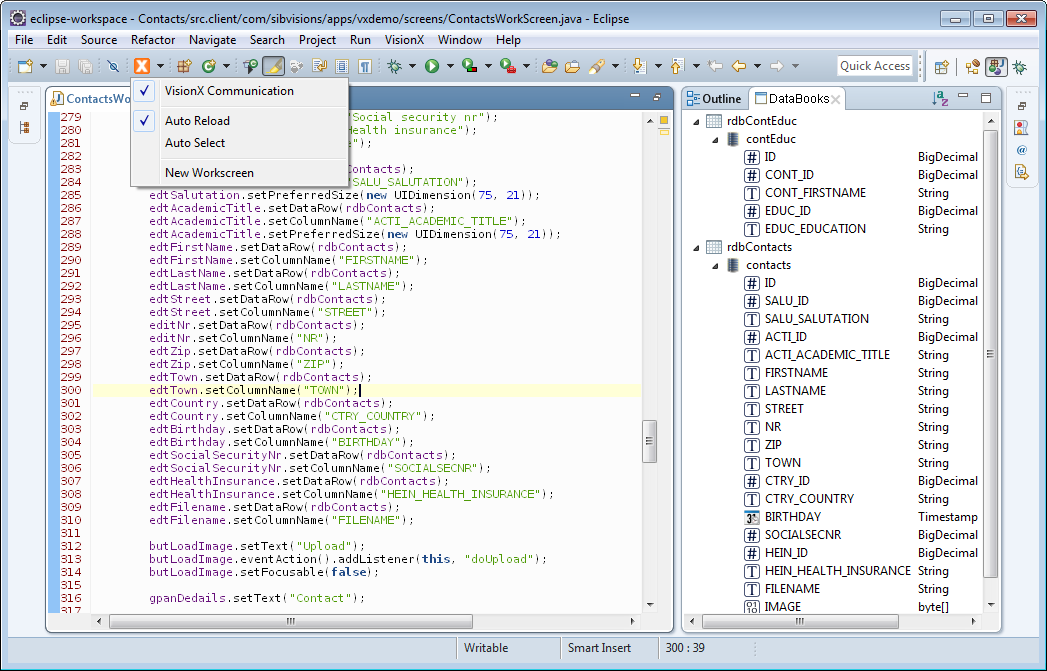
The connection to VisionX can be toggled by clicking the menu item and selecting the option “VisionX Communication”.
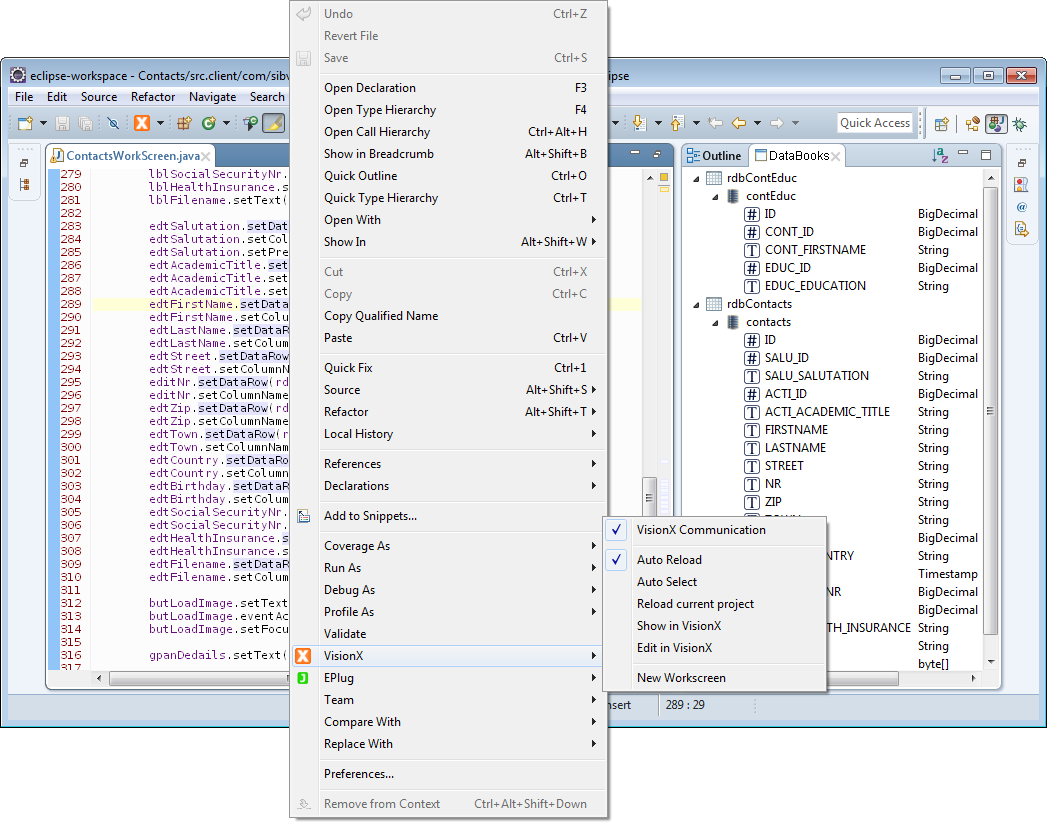
It can also be toggled through the context menu of the editor.
Notification of Changes
EPlug has the ability to inform VisionX that changes to the sources have occurred, and that it should reload the application. That can be done manually by selecting the command from the menus, or the automatic reloading can be activated.
When automatic reloading is activated, VisionX will automatically reload the application every time a file in the project has been changed.
Synchronizing the Selection
The selection between VisionX can also be synchronized either manually, through the same menus, or by automatic means.
The selection in Eclipse is the position of the cursor in the text editor; he selection in VisionX is the actual selection of components in the design mode. If design mode is not active in VisionX, it will not be turned on.
Additional Commands
There are various additional commands available to interact with VisionX.

Edit in VisionX
The currently selected item or source file is also selected in VisionX, and the design mode is turned on in VisionX.
New Workscreen
The New Workscreen Wizard is opened in VisionX.